I Designed a 3.73L 3D Printed Mini ITX Case. Two Parts, Four Screws.
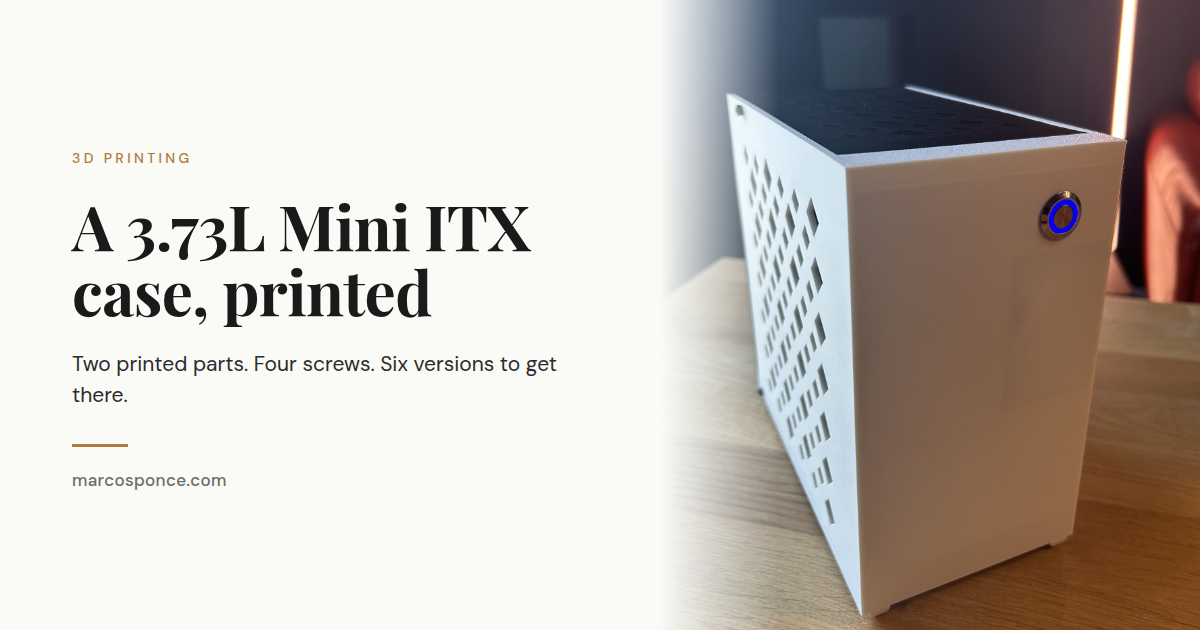
The first version of this case was 4.7 liters, took seven printed parts, and needed metal threaded inserts I had to melt in with a soldering iron. It worked. It was also miserable to build, and it took two full print plates to make one case.
Six versions later it is 3.73 liters, two printed parts, and four screws. That’s the whole bill of materials. No standoffs, no heat-set inserts, no specialty hardware ordered from three different sites.
Short version for the skimmers: a 3D printed Mini ITX case can go under four liters if you stack the GPU and the PSU on the same side, and it stays structurally sound if you split the design into a hot skeleton and a cool shell. The skeleton takes ABS, ASA, or PETG because it hits 61.8°C. The shell stays at 45°C, so it can be PLA, which means it can be glow-in-the-dark. Below are the real clearances, the thermal numbers I measured, and every version that got it here.
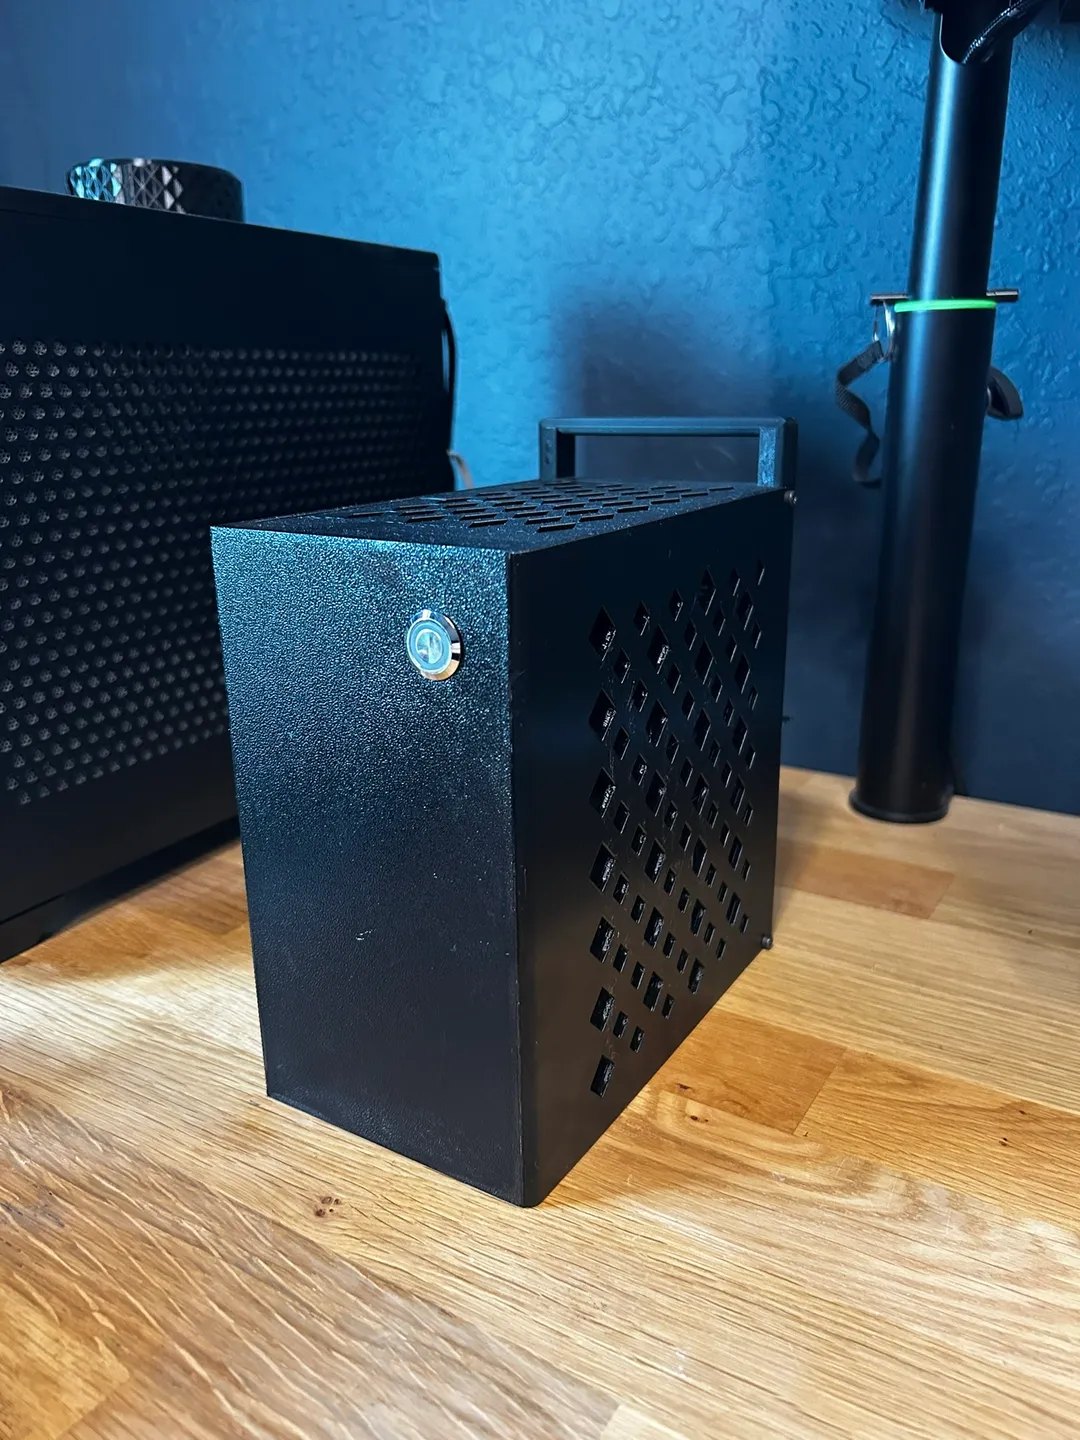
KEY FACTS
Volume is 3.73 liters. Two printed parts, four M3 x 6mm screws, nothing else.
The trick that gets you under four liters: stack the GPU and the PSU on the same side of the motherboard.
Hottest measured point in the case is 61.8°C, which rules PLA out for the structural part.
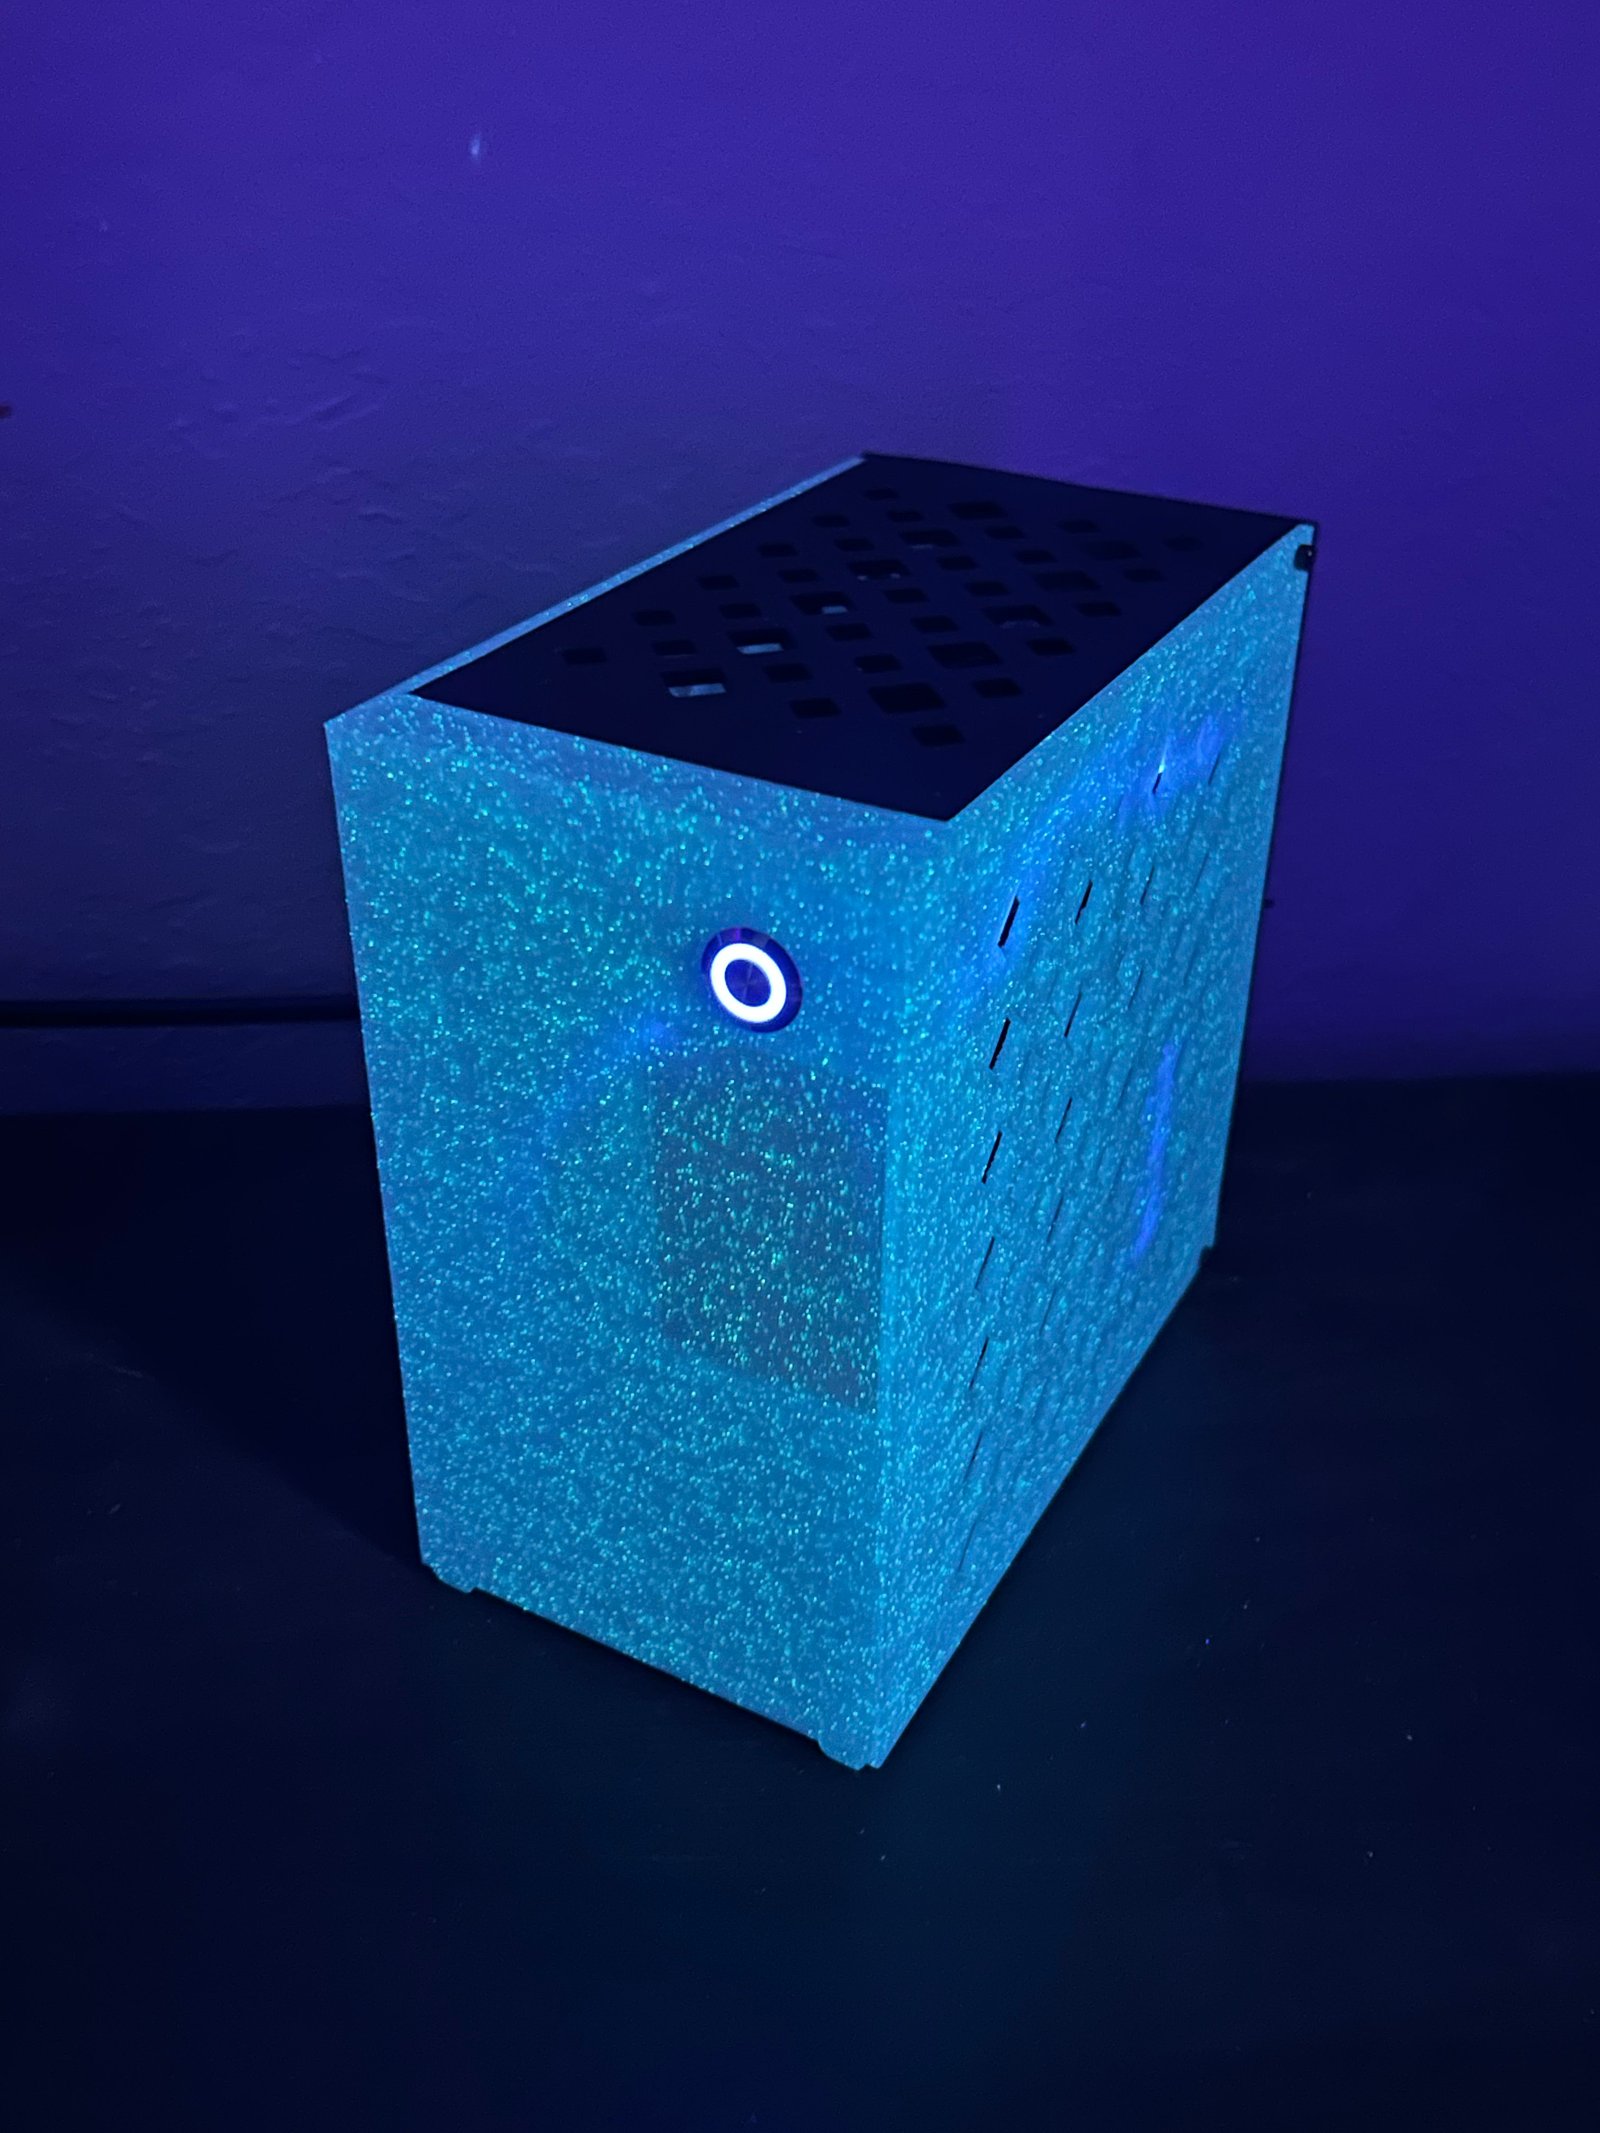
The outer shell never went above 45°C, so it can be printed in anything, including glow-in-the-dark PLA.
About 12 hours to print at standard quality on a Bambu P1S. Around 22 hours if you want more walls and finer lines.
Under4L at a glance
Every hard limit in one place. These are the numbers to check a part list against before you start a twelve hour print.
| Case | Volume (L) | Max GPU length (mm) | Max GPU height (mm) | Max GPU thickness (mm) | Max CPU cooler (mm) | PSU form factor | Price (USD) |
|---|---|---|---|---|---|---|---|
| Under4L (V6 / Carry) | 3.73 | 182 | 69 | 40 | 37 | Flex ATX | 9.98 |
Why I designed my own case instead of buying one
I needed something portable during a stretch where I was traveling a lot, and I already had a 3D printer sitting in the room. The cases that exist at this size cost more than I wanted to spend, and the alternative was gutting my main build for parts, which I wasn’t going to do either.
So I went looking for printable designs in the sub-4L range and did not find much. Plenty of printable cases exist. Almost all of them are 5 liters and up, or they are a shell wrapped around a purchased chassis. The ones that were genuinely small either needed a pile of hardware or assumed you were comfortable with heat-set inserts.
That gap is the entire reason I started sketching. I wanted a case someone could start printing before bed and assemble before work.
How you get a Mini ITX build under four liters
Stack the GPU and the PSU on the same side of the board.
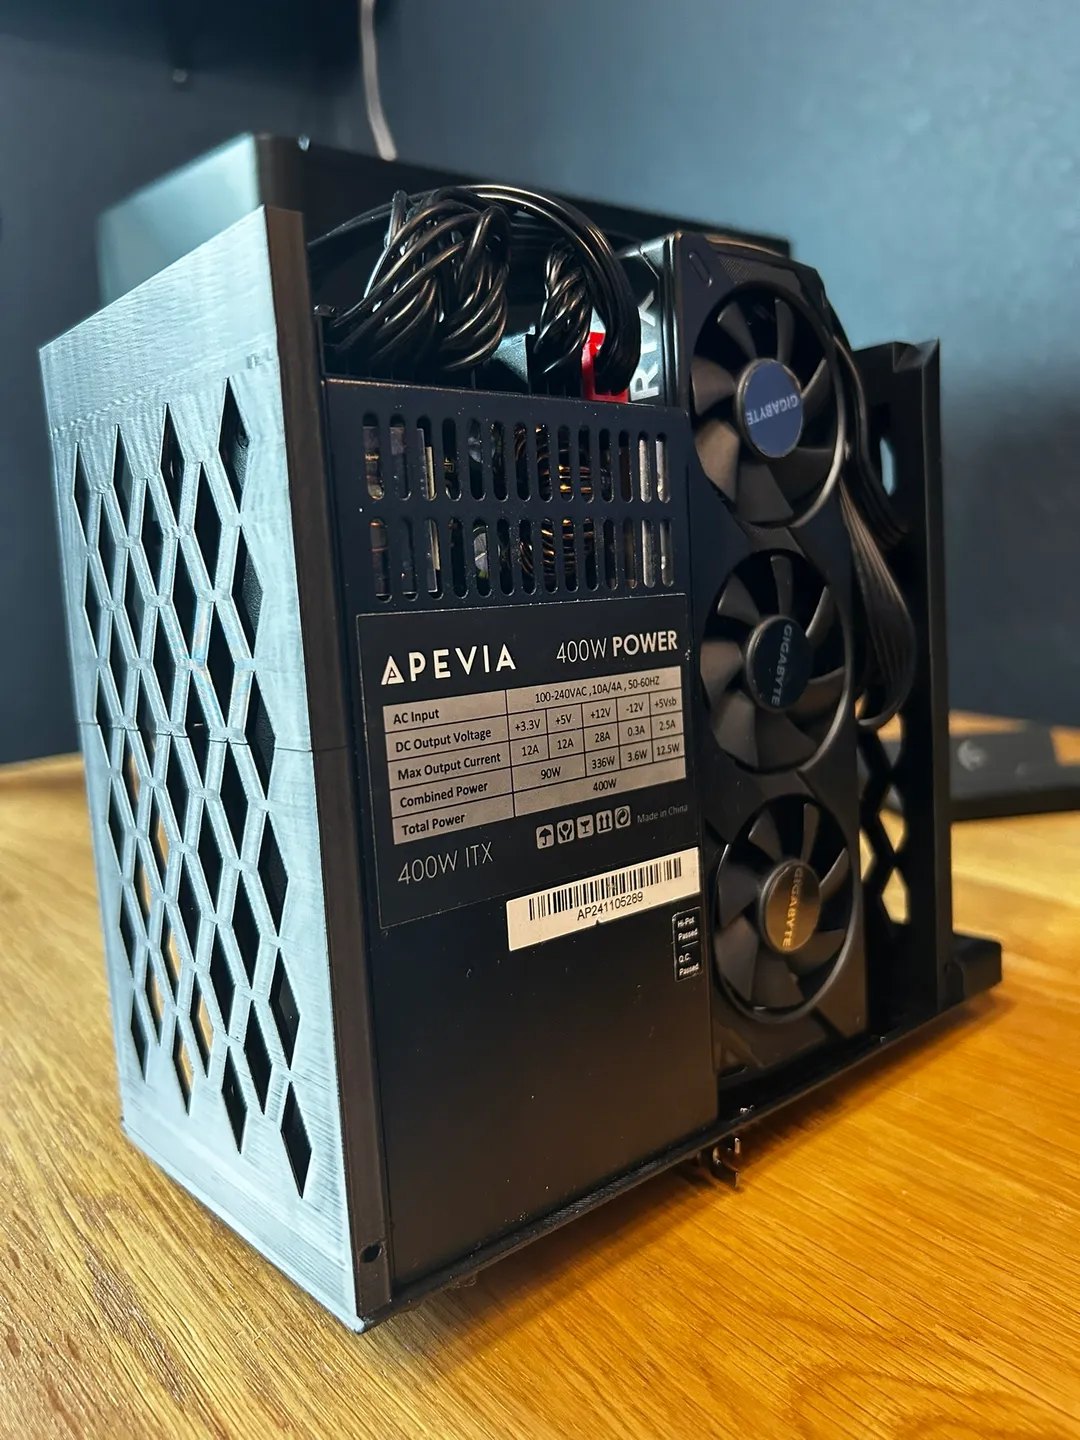
That is the one decision the whole design hangs on. Most compact cases put the GPU on one side of the motherboard and the power supply somewhere else, usually above it or behind it, and that arrangement sets a floor on how small the box can get. If you put the graphics card and a Flex ATX supply in the same vertical column, the case only has to be as wide as the motherboard plus that one stack.
Everything else in the design is a consequence of that. The 37mm cooler limit exists because the board sits close to the shell. The Flex ATX requirement exists because an SFX supply is too tall for the column. The 200mm riser cable exists because the GPU has to rotate out of the slot to sit in that stack.
What actually fits inside a 3.73L case
These are hard limits, not comfortable ones. At this volume there is no slack anywhere, so measure your parts before you print.
Graphics cards are where this bites hardest, because vendor slot labels are rounded and a card sold as 2-slot can be anything from 36 mm to 43 mm thick. I ended up pulling the real millimetre dimensions for 300 cards to answer that question properly, and the whole thing is published as a searchable GPU dimension database with length, height and thickness for every single-8-pin card across eight generations. Check your card there before you commit to a print.
| Part | Limit | Notes |
|---|---|---|
| Motherboard | Mini ITX | V6 expanded support for current boards |
| CPU cooler | 37mm tall | Low profile only. This is the spec people miss most often |
| RAM | 37mm tall | Most low profile kits clear it. Tall heatspreaders do not |
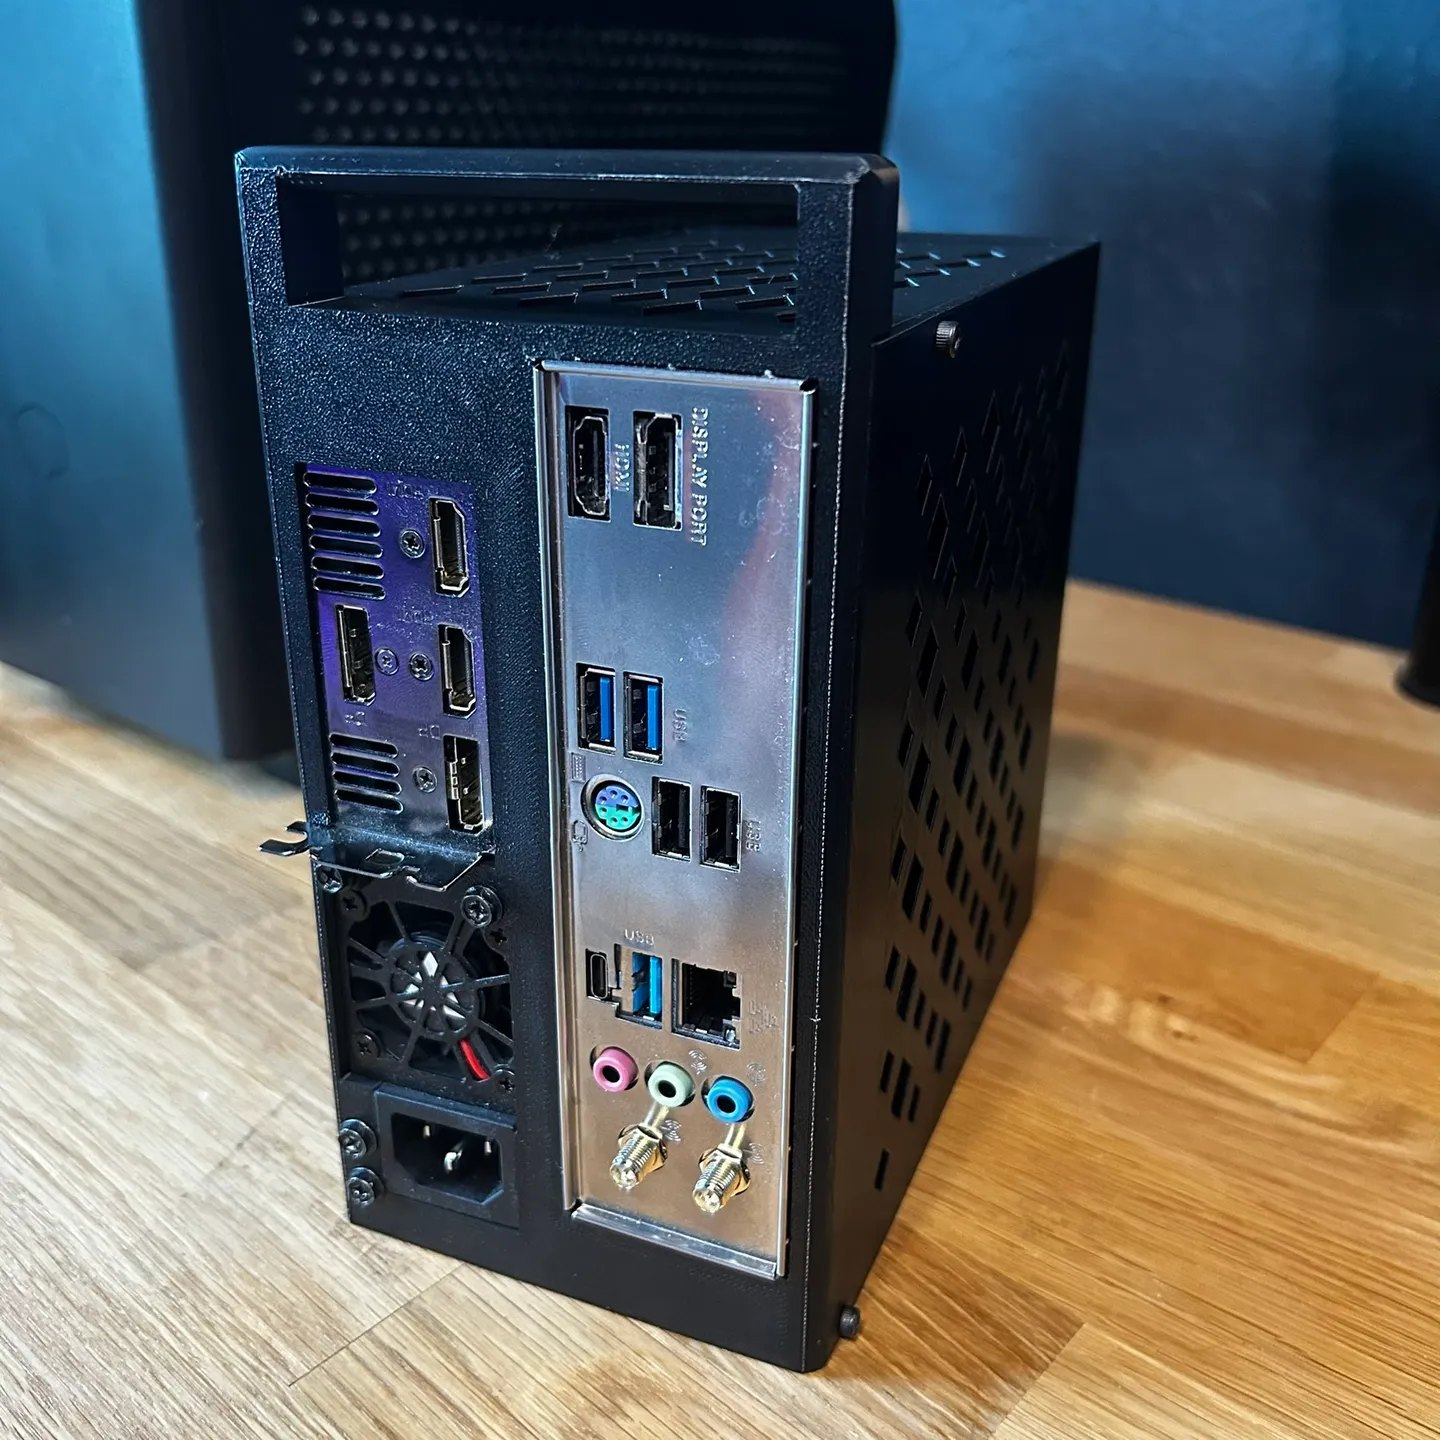
| PSU | Flex ATX, 170 x 82 x 41.2mm | That is the standard size, so basically any Flex ATX unit works |
| GPU | 182 x 69 x 36-40mm | Tested with a Gigabyte RTX 5060 Low Profile |
| Riser cable | 200mm PCIe | Required if you use a GPU. Budget for it before you print |
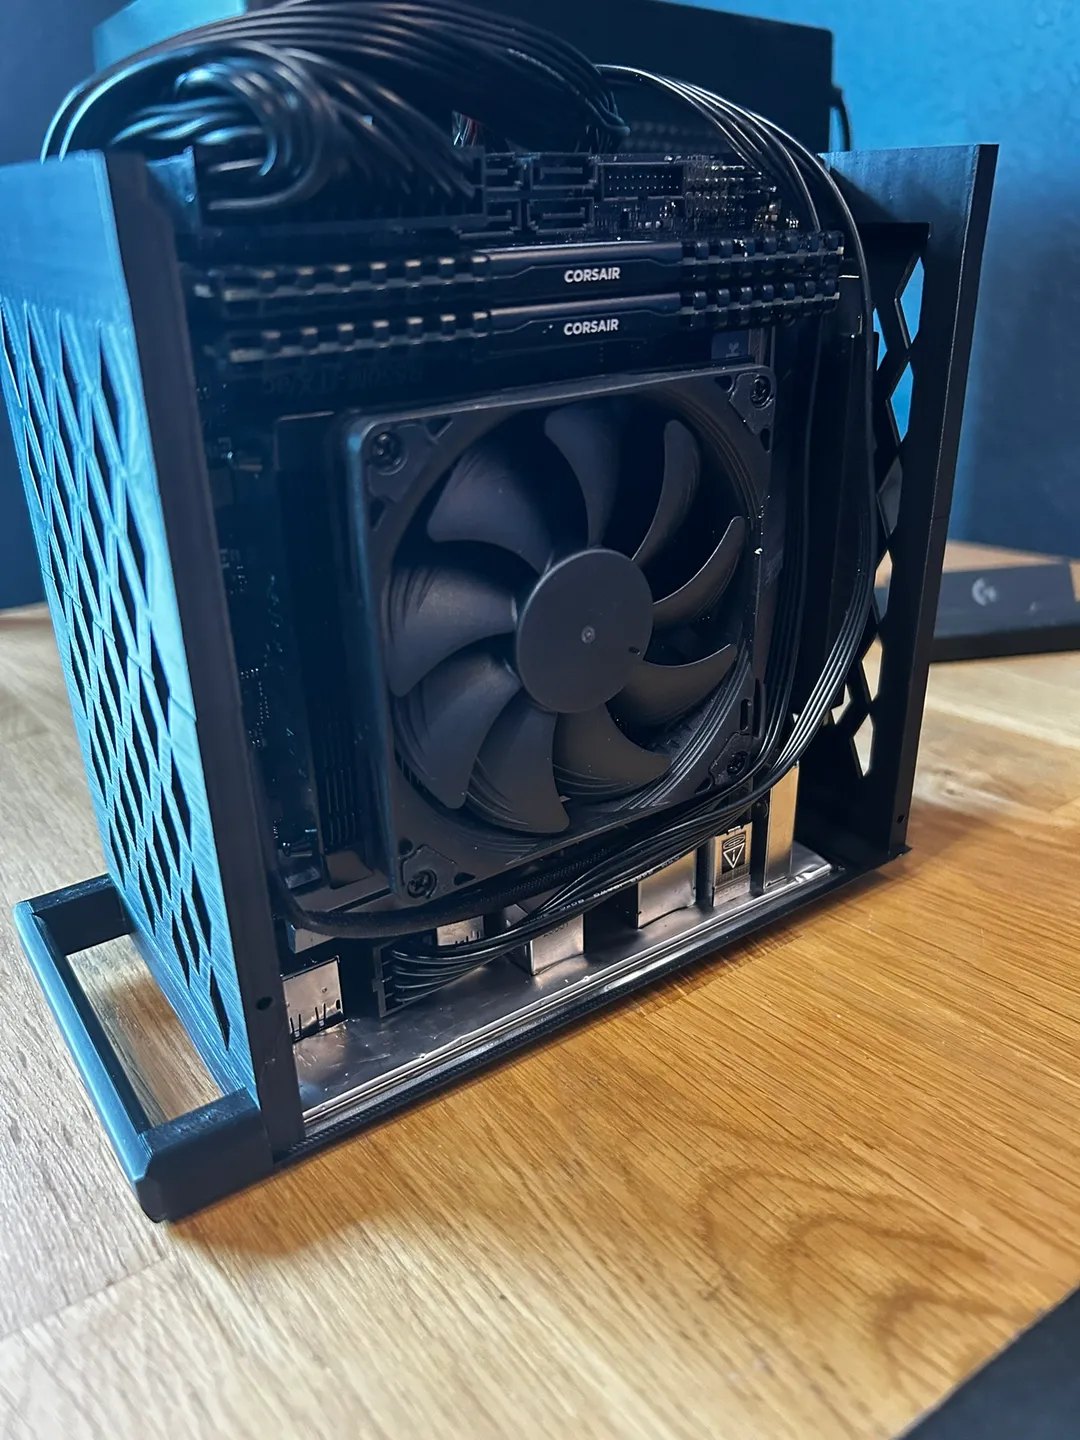
The GPU is held by more than the riser, which is the question I get most. The riser screws into the base plate, the backplate is modeled so the card’s bracket cannot shift, and there is a cutout the bracket snaps into that stops it moving front to back. The front plate backs it up if the card is on the heavier side.
Do the thermals actually work at this size?
I stress tested it with a thermometer rather than guessing, because at 3.73 liters the honest answer matters more than the optimistic one.
The hottest point I could find, at the top and back exhaust near the motherboard, peaked at 61.8°C. The outer shell panels never went past 45°C.
Those two numbers are the whole material strategy. PLA softens somewhere around 60°C, so the structural part that touches components cannot be PLA. It needs ABS, ASA, or PETG, anything with a glass transition temperature above 60°C. I used ABS.
The shell is a different story. At 45°C, PLA is fine, and that turns the cosmetic half of the case into a free choice. Glow-in-the-dark, marble, wood fill, silk, whatever you feel like running. The skeleton does the work and the shell is just the outfit.
Airflow is passive and simple. Air comes in through the vented left and right panels, and exhausts out the top and back through the Flex ATX fan and the cutouts. Every face is vented except the front plate.
How it got from 4.7L and seven parts to 3.73L and two
Every version was an attempt to delete something. Not to add a feature. The case is called Stak, after the stacked layout, and it sells in two shells: Stak 3.7 Carry with the handle, and Stak 3.7 Classic without it.
| Version | Volume | Printed parts | What changed |
|---|---|---|---|
| V1 | 4.7L | 7 | It worked. Screws, standoffs, and threaded inserts that needed a soldering iron |
| V2 | 4.7L | 7 | Assembly order cleaned up. Still too many pieces |
| V3 | 4.7L | 6 | Standoffs and inserts gone. Skeleton and backplate now print vertically, which cut hours off the job |
| V4 | 3.99L | 4 | Under four liters for the first time |
| V5 | 3.77L | 2 | The big one. Twelve case screws down to four |
| V6 | 3.73L | 2 | Vertical and horizontal feet options, wider motherboard support |
| Carry | 3.73L | 2 | Printed carry handle, reworked mesh, rounder edges. Same volume, and the one I print now |
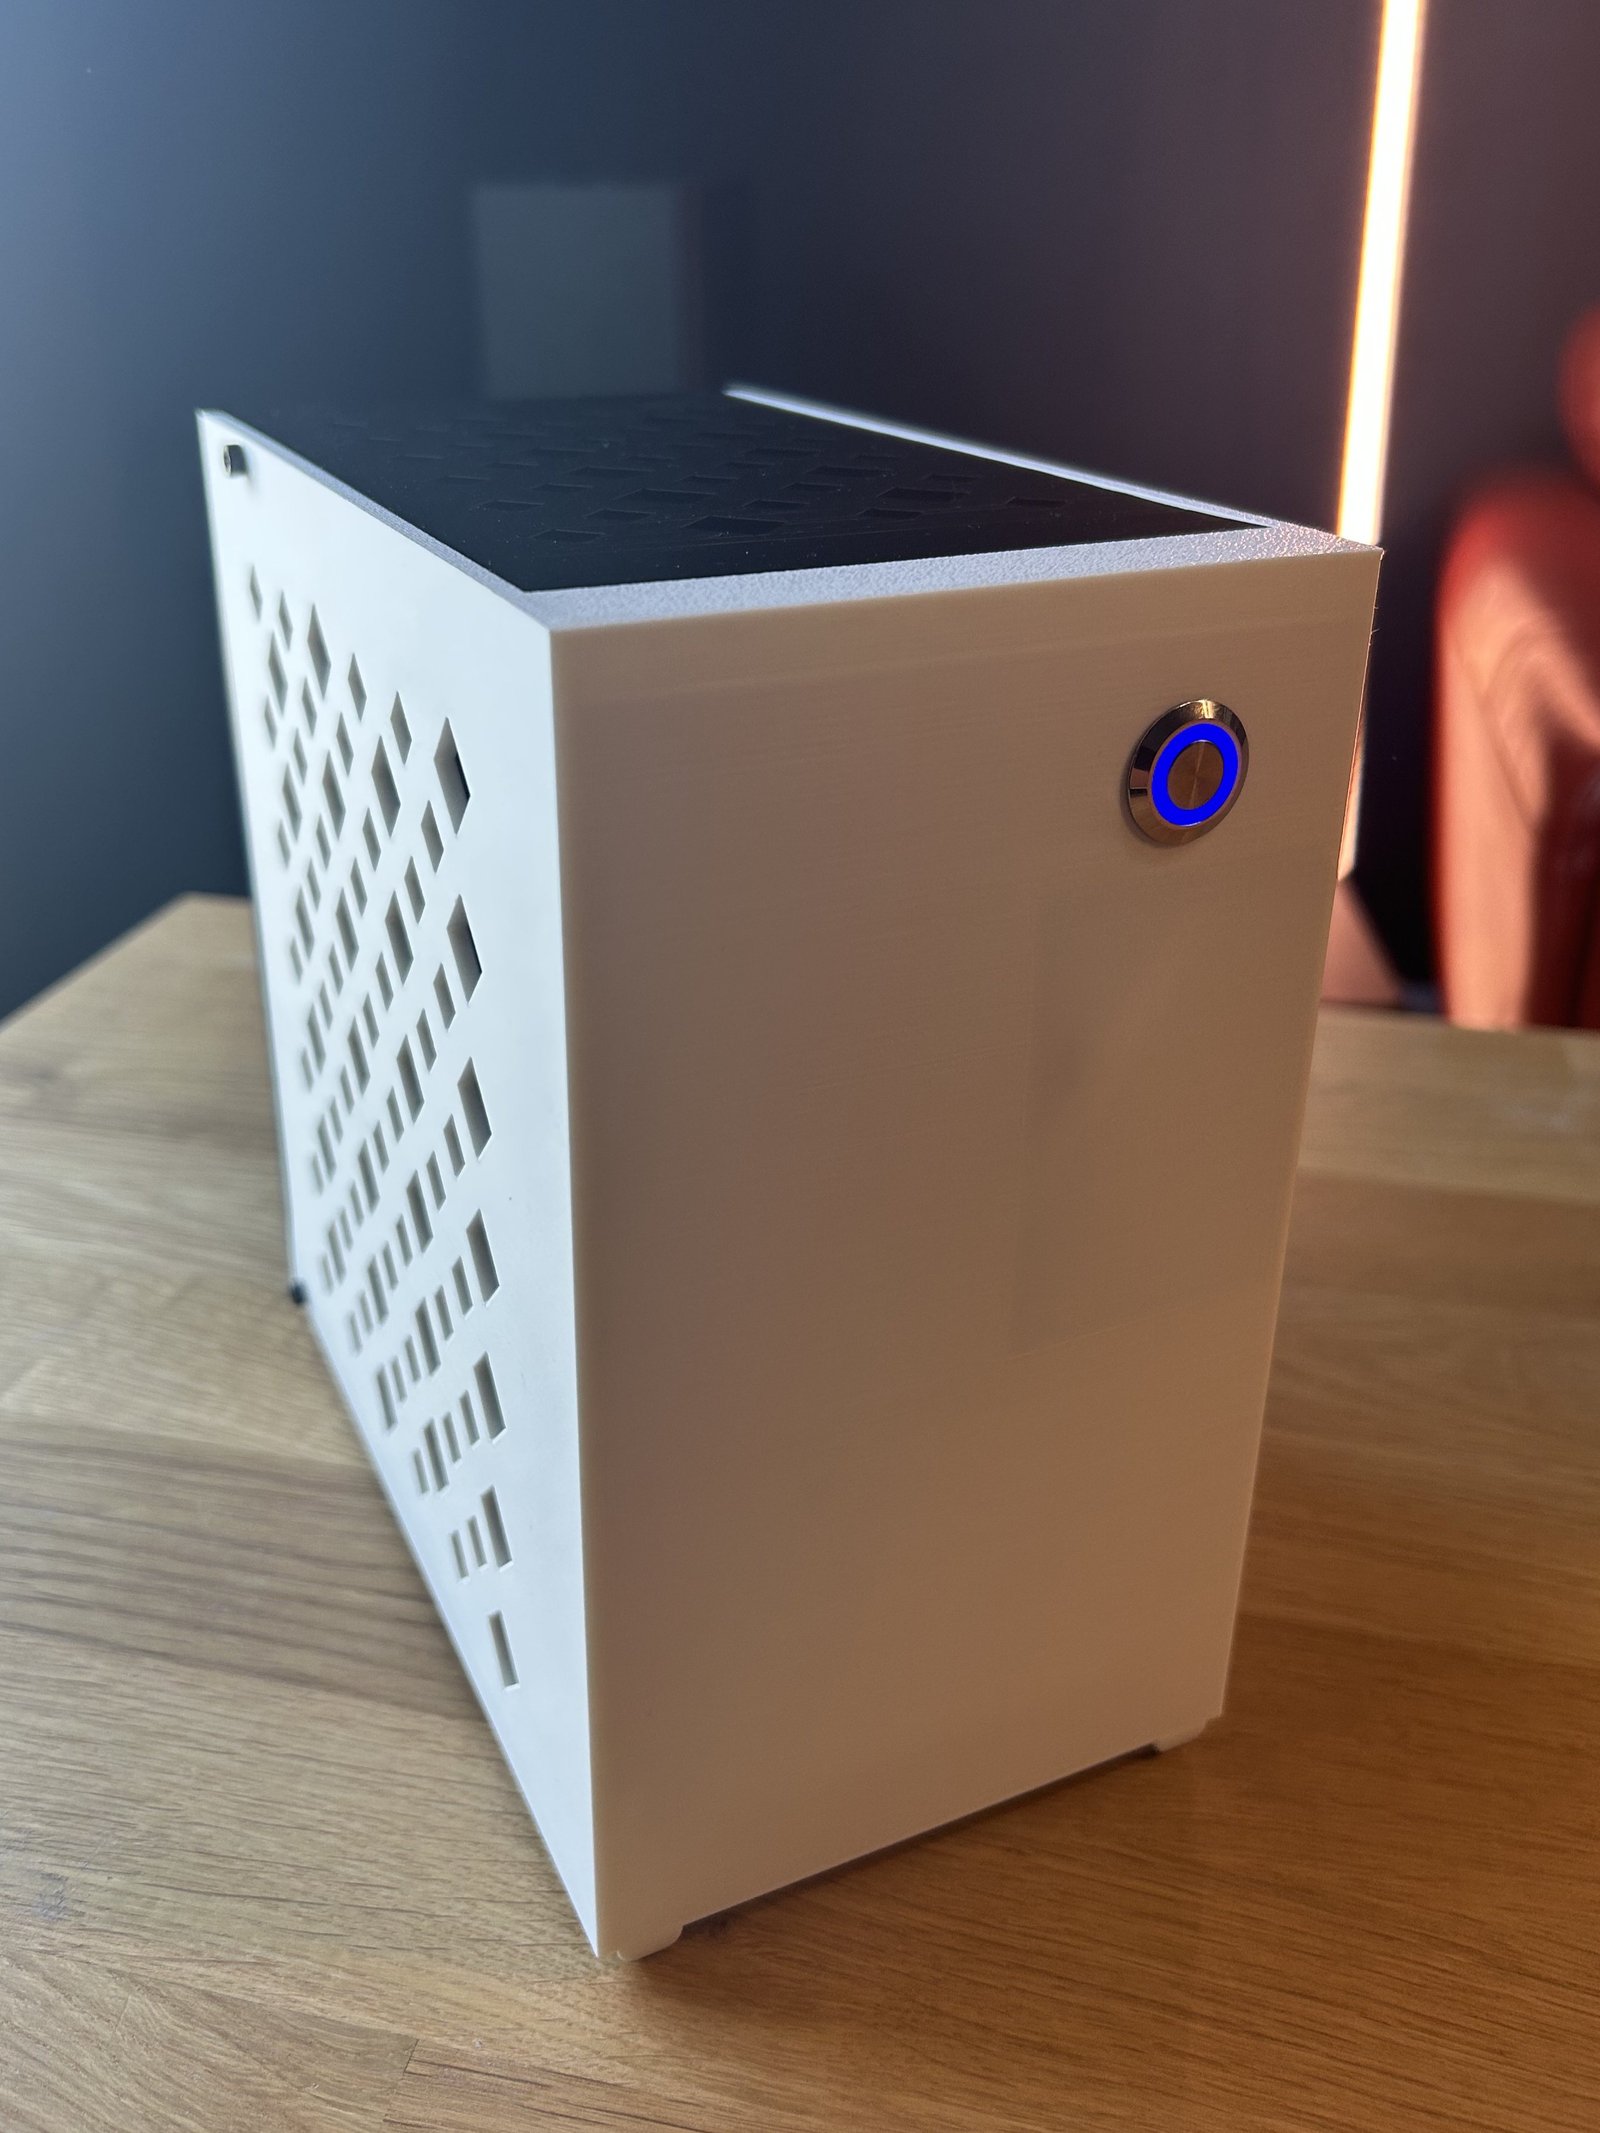
V5 is the version I’m proudest of and it is the one that looks like the least work in the table. Going from four parts to two meant redrawing the whole thing so the skeleton could carry loads that four separate panels used to share. The volume only dropped 0.22 liters. The build time dropped by more than half.
V3 is worth calling out for a different reason. Reorienting the skeleton and backplate so they print vertically did nothing for volume and everything for print time. Print orientation is a design decision, not a slicer setting, and I did not understand that until version three.
What printing and assembling it takes
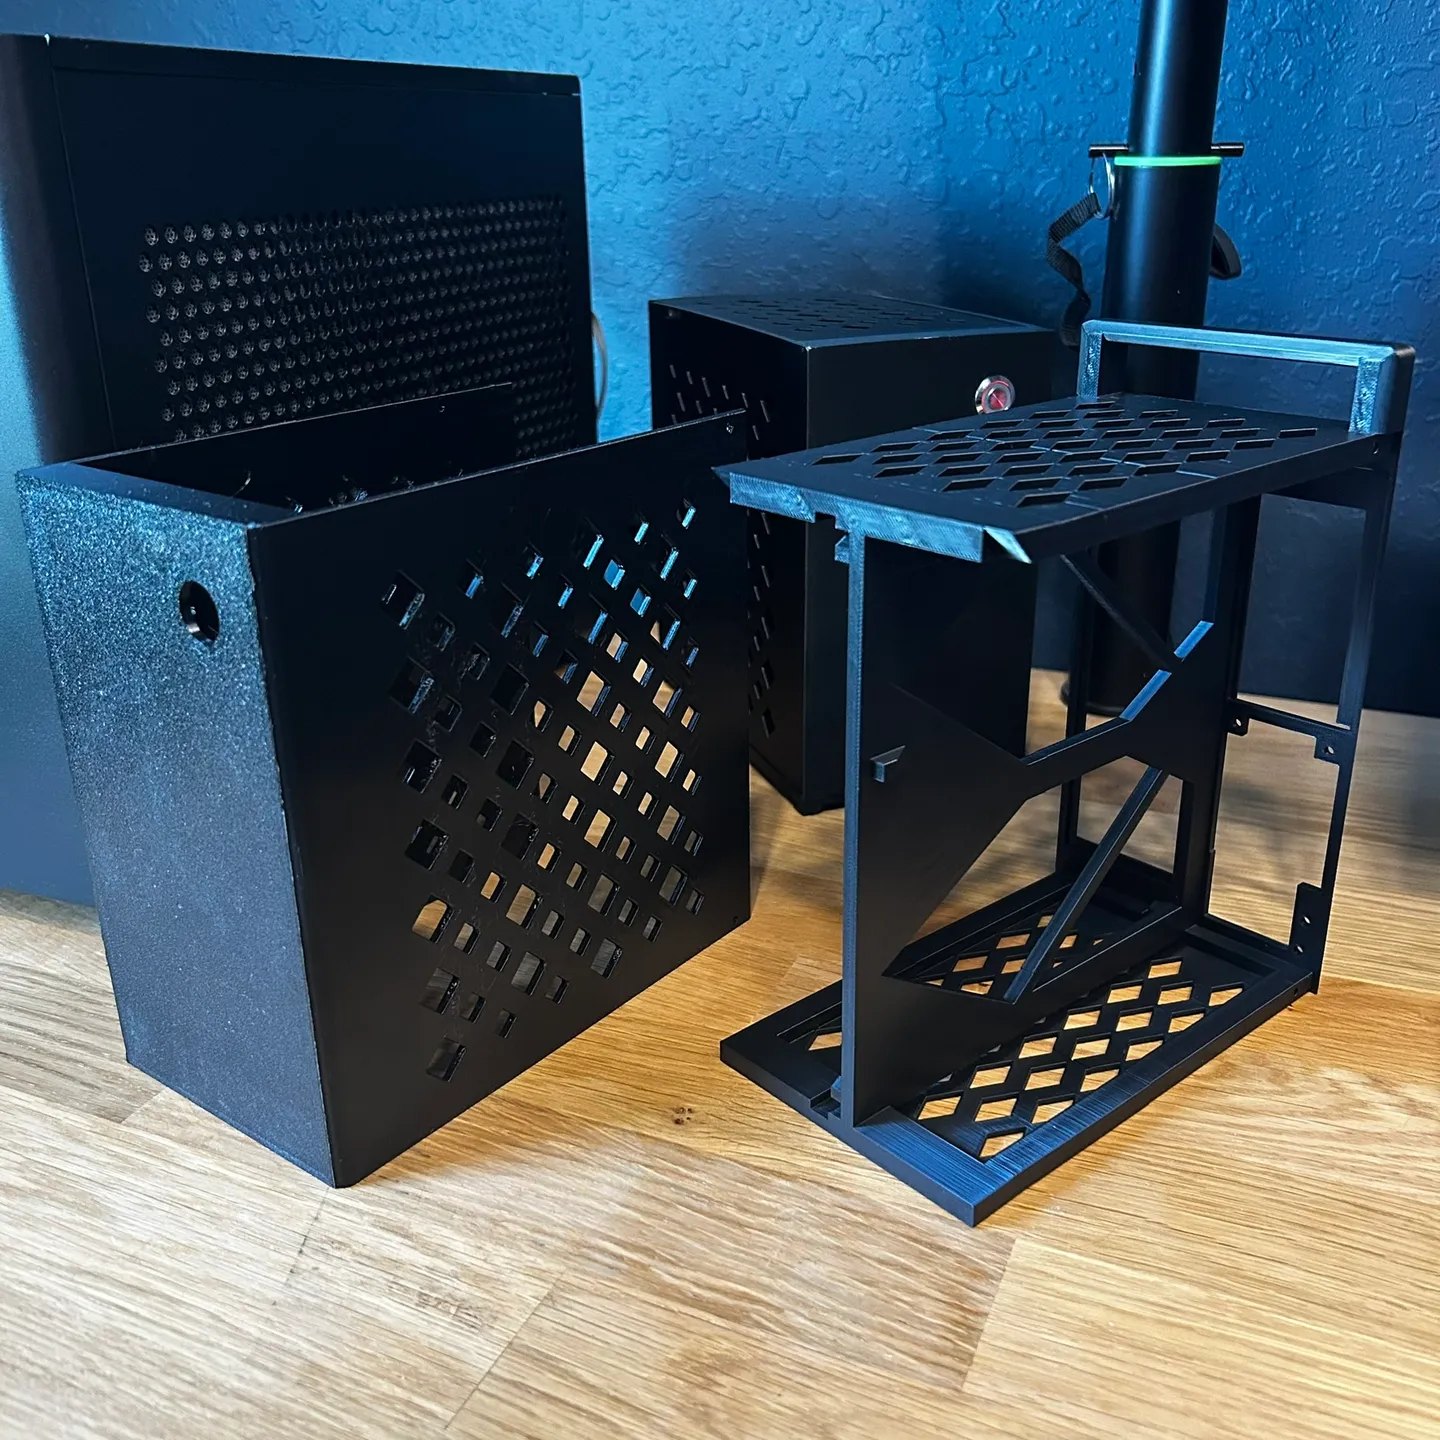
Two files. Print the skeleton in ABS, ASA, or PETG. Print the shell in whatever you want. Both fit on one plate on a Bambu P1S at 256 x 256mm.
Roughly 12 hours at standard quality. Closer to 22 if you add walls and drop the layer height for a nicer surface finish. Print them in the orientation they come in and you need no supports at all, except a small one for the power button if you leave supports enabled.
Assembly is four M3 x 6mm hex socket head cap screws. There is no step where you heat anything, align anything with a jig, or hold a part while glue sets. That was the design target from V1 and it took six versions to actually reach it.
What the SFF community said about it
I posted it to r/sffpc in March. Five hours in it had 257 upvotes at a 99.6% upvote rate, about 21,000 views, and 35 comments. For a first post from an account nobody knew, that told me the gap I thought existed was real.
The comments were more useful than the upvotes. People asked how the GPU is secured, what the glow filament was, and whether it could be adapted for an SFX power supply. One person offered to print the skeleton in Ultem 9085 on an industrial machine at work, which is not a material I will ever own but is exactly the kind of thing an open STL makes possible. Somebody said “ready in the morning should be a category,” which is the best summary of the design goal anyone has given me, including me.
Somebody also pointed me at the Mantis, a fully printed ITX case that is free on Printables. It is worth being straight about this: the Mantis is a good design and it costs nothing. It is about 4.4 liters against my 3.73, it is three printed parts, and it needs 16 M3 screws and 16 heat-set inserts plus stick-on rubber feet. It also wants the whole case in ABS or PETG rather than splitting hot and cool parts.
So the honest positioning is this. If you want a free file and you don’t mind heat-set inserts, print the Mantis. Mine is smaller, assembles with four screws and no inserts, has printed feet in the file, and lets you print the visible half in fun filament. Whether that is worth paying for is genuinely your call.
What I would change next
The 37mm cooler ceiling is the real constraint, and it is the thing that decides whether this case works for you before anything else does. It is a consequence of the stacked layout, so fixing it means a different case rather than a revision of this one.
The GPU limit is the other one. A 182mm low profile card is a narrow shopping list. I have been going through dimension data on a few hundred current graphics cards to work out what envelope actually unlocks the mainstream compact cards people already own, and the answer is nowhere near 3.73 liters. That is turning into a second, larger design at around 7.7 liters that fits real two-slot cards. Different case, same two-part idea. What that dimension data actually says about length, thickness and height is written up in the SFF case GPU clearance guide.
For this one, the open items are a horizontal print orientation set and a proper printed stand. Neither changes the case. Both make it easier to live with.
Get the files
The STL files are $9.98. You get two files, the skeleton and the shell, in vertical print orientation, plus an assembly guide and the screw and riser specs. You supply four M3 x 6mm screws and a 200mm riser cable if you’re running a GPU.
Most of the photos here are the Carry shell. The white case up in the version history is the Classic. Identical volume, clearances, thermals, parts count and price, so pick on whether you want a handle on top or a clean box.
STAK 3.7 CARRY & CLASSIC · STL FILES · $9.98
If you’re wary of buying files from someone you found through a blog post, that’s fair. My Etsy shop has been open since 2021 and has done 307 sales at 4.7 stars across 21 reviews, covering everything I’ve listed there, not just this case. The reviews are public and worth two minutes before you spend ten dollars.
If you print one, I want to see it. Post it to r/sffpc and tag me, or send it over. Every version of this thing got better because somebody asked a question I hadn’t thought about.
You can see my other builds on the PC builds page, including the six machines that came before I started designing my own enclosures. If you like the hardware side of this site, the Proxmox home server writeup is the same kind of post about a much larger box, and there’s more about me and what I build on the about page.
Common questions
Can I print the whole case in PLA?
No. The skeleton reaches 61.8°C under load and PLA starts softening around 60°C. Use ABS, ASA, or PETG for the skeleton. The shell stays at 45°C, so PLA is fine there.
Do I need a riser cable?
Yes, a 200mm PCIe riser, if you are installing a graphics card. The stacked layout only works because the card sits parallel to the board rather than in the slot. If you are building without a GPU you can skip it.
Will an SFX power supply fit?
No. It has to be Flex ATX at 170 x 82 x 41.2mm or smaller. An SFX unit is too tall for the stacked column and there is no way to make room for one without redesigning the case. Somebody asked for an SFX version on Reddit and it is on my list, but it would be a different case.
How loud is it?
I have not put a meter on it, so I am not going to give you a number. What I can tell you is that the case is passive, with no case fans of its own, so the noise is whatever your Flex ATX supply and your low profile cooler make. Flex ATX units run small fast fans and they are usually the loudest part of a build like this.
Do I need supports?
Not if you print the files in the orientation they come in. If you leave supports on in your slicer it will generate one small support for the power button, which is harmless.
What printer do I need?
Anything with a 256 x 256mm bed and an enclosure for the ABS part. I use a Bambu P1S. PETG is more forgiving if your printer is open, though it needs a slower first layer to sit flat at this footprint.
Can I modify the files?
Yes, for your own builds. They’re STL rather than STEP because the case was designed in TinkerCAD, which does not export STEP, so heavy parametric edits are harder than they would be with a Fusion source file. Fair to know before you buy.
Get the files
The V6 Carry revision is two STL files, the skeleton and the shell, in vertical print orientation, with an assembly guide and the screw and riser specs. The Under4L case files are on Gumroad for $9.98. You supply four M3 x 6mm screws and, if you are fitting a graphics card, a 200mm PCIe riser.
Before you buy, check your card against the GPU dimensions dataset: 300 cards with real millimetre thickness, because a card sold as two-slot can be anywhere from 36 to 43mm and only 182 x 69 x 40mm fits this case.
Stay in the loop.
No spam, just signal.
I send one email when I publish something worth reading. Stock deep dives, new projects, tech breakdowns, and what I'm learning from building in public.
Free forever. Unsubscribe anytime. I respect your inbox.