I know nothing about electronics. I built a dB meter anyway.
I play guitar and lead a worship band. I can tell you what a chord is doing. I cannot tell you what a resistor is doing, and before this project I could not have told you what I2S stood for.
That did not stop me from building a Raspberry Pi Pico dB meter that tracks my noise dose while I mix, calibrated to within the accuracy of the reference I had. Claude picked every part, wrote every line of code, and talked me through every failure. I wired it and ran the tests. This post is what that looked like, including the two bugs that would have stopped me cold on my own.
KEY FACTS
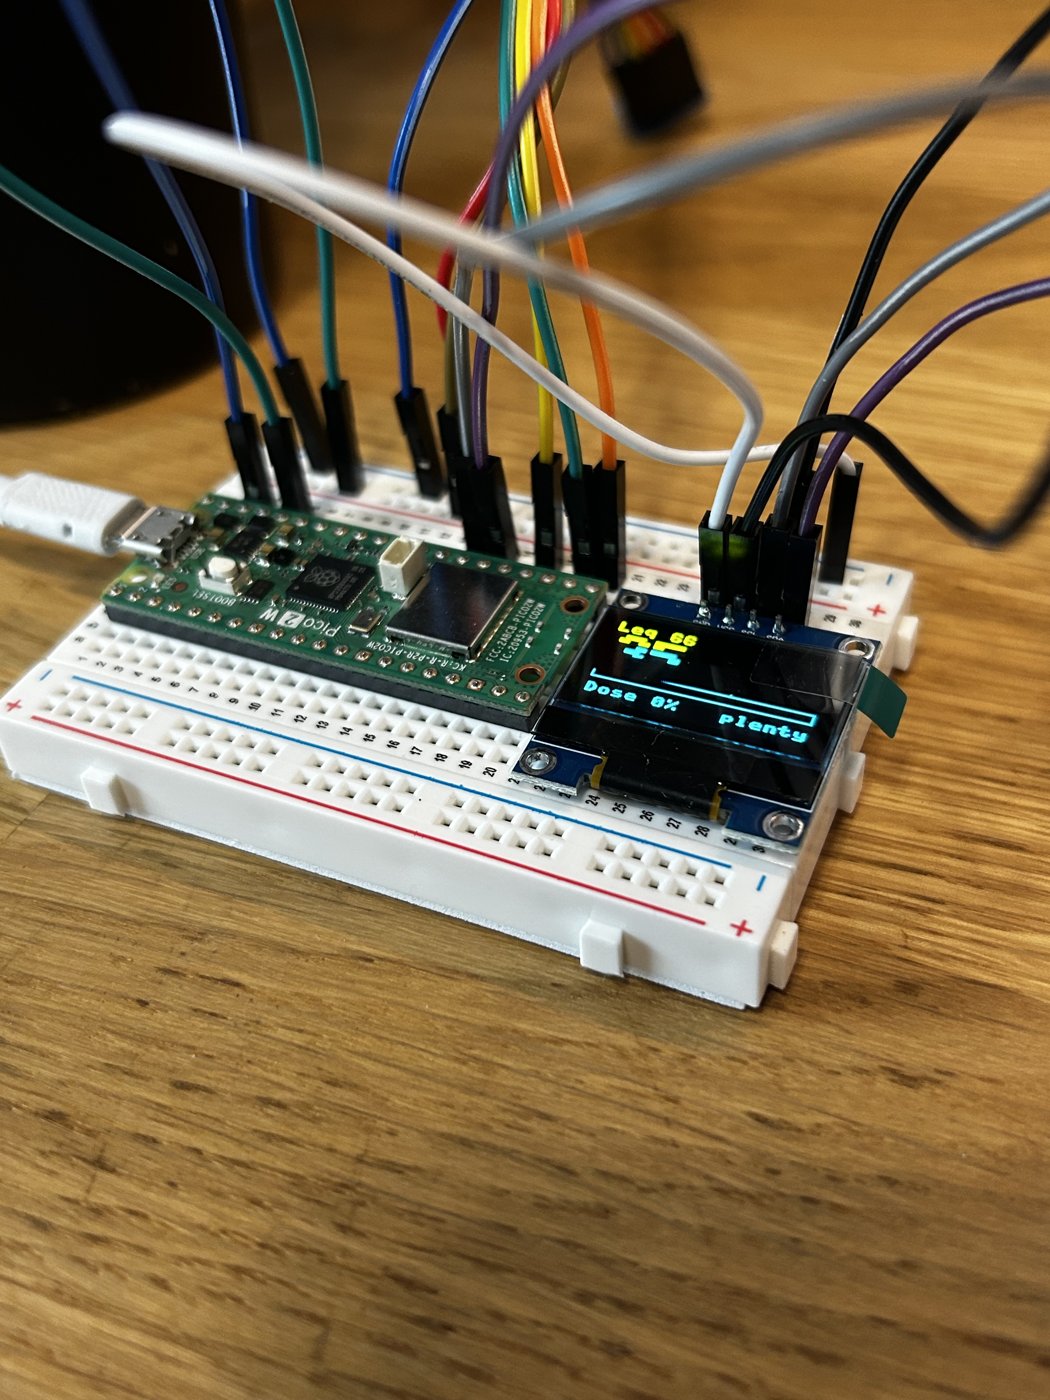
The meter runs on a Raspberry Pi Pico 2 W with an Adafruit SPH0645LM4H I2S microphone and a 0.96 inch SSD1306 OLED, all on a breadboard.
It tracks noise dose against the NIOSH limit of 85 dBA for 8 hours, where every 3 dB louder halves the safe time. 94 dBA gets you 1 hour.
One calibration constant does the heavy lifting. The math predicted 123.0. Measured against the NIOSH app, it came out at 124.0.
Accuracy is about plus or minus 2 dB, because that is the accuracy of the phone app it was calibrated against.
The mic’s noise floor is 29 dBA, so anything under about 40 dBA is soft. A quiet room read 33.7 dBA.
What I actually brought to this
Let me be specific about how little I knew, because that is the point of this post.
I knew what a breadboard looked like. I knew a Raspberry Pi was a small computer. I did not know the difference between a digital and an analog microphone, why that would matter, or that “A-weighting” was a thing. If you had handed me the parts list and said “go,” I would have bought the wrong microphone, because the cheap analog sound sensors are the first thing that comes up when you search.
Here is how the work split:
| Job | Who did it |
|---|---|
| Decide what the meter should measure | Me (I wanted to protect my hearing while mixing) |
| Pick the parts and explain why | Claude |
| Pin map and wiring diagram | Claude |
| Plug in the jumper wires | Me |
| Write the code (filter, dose math, display, calibration) | Claude |
| Run each test script and read the result back | Me |
| Figure out why a test failed | Claude, from the numbers I sent back |
| Calibrate against a reference | Me, following Claude’s method |
The right-hand column is the honest version. I was the hands and the eyes. If you have ever used Claude as a coding partner, it is the same deal, except the thing you are debugging sits on your desk. I wrote about a similar arrangement for this website in how I let Claude run my WordPress site.
A dose meter, not a loudness meter
Most DIY sound meters answer “how loud is it right now?” That number is close to useless for hearing. What damages your ears is level multiplied by time. A loud chorus for thirty seconds is fine. A long mixing session at a moderately loud level is not.
So the meter shows four things: the current level in dBA, the average for the session (LAeq), the percentage of the day’s safe dose I have used, and how long I have left at the current average. It starts on power-up with no computer attached. Holding the BOOTSEL button for about a second resets the dose for a new day.
The dose math follows NIOSH, the US agency that sets the recommended exposure limit. Claude checked the dose tracker against every row of this table:
| Average level (dBA) | Time to 100% of the daily dose |
|---|---|
| 85 | 8 hours |
| 88 | 4 hours |
| 91 | 2 hours |
| 94 | 1 hour |
| 97 | 30 minutes |
| 100 | 15 minutes |
| 103 | 7.5 minutes |
That table is the whole reason to build a dose meter. Every 3 dB halves your time. A mix that feels only a little louder can cost you half your day.
The parts, and why these ones
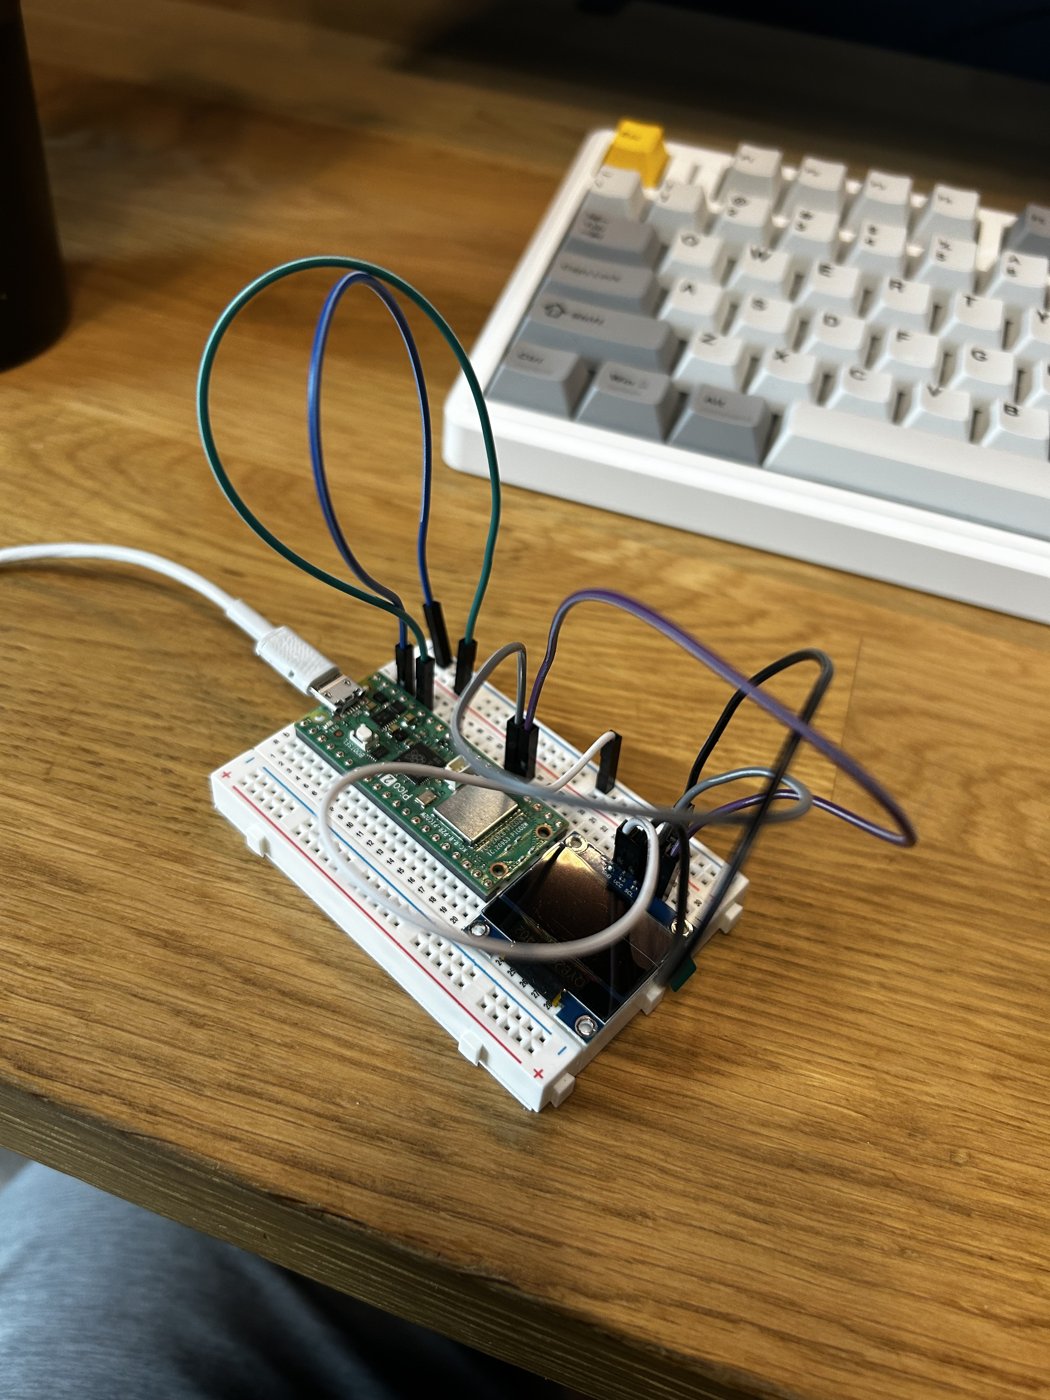
| Part | What it does | Why this one |
|---|---|---|
| Raspberry Pi Pico 2 W | Runs the code (MicroPython) | Its chip has a floating point unit for the filter math, and Wi-Fi can set the clock later without an extra part |
| Adafruit SPH0645LM4H I2S mic | Hears the room | Digital, with a factory-specified sensitivity of -26 dBFS at 94 dB SPL, so the readings mean something |
| 0.96 inch SSD1306 OLED | Shows the numbers | Cheap, common, two data wires |
| Breadboard and jumper wires | Holds it together | Nothing permanent while I learn |
The microphone choice is the one I would have gotten wrong. Analog modules like the KY-038, MAX4466 and MAX9814 are everywhere and cost almost nothing, but none of them has a calibrated sensitivity. You get a number that moves when it gets louder, with no way to turn it into decibels. The I2S mic comes with a spec, and the spec is what makes calibration a single step instead of a guess.
The other decision I would never have known to make: A-weighting. Your ears are much less sensitive to low bass than to the midrange, and every hearing-safety figure uses a filter that matches that. Without it, bass-heavy music reads 10 to 15 dB high. In my quiet room, the unweighted reading was 48 dB and the A-weighted one was 34 dBA. Same room, same moment.
How Claude kept a beginner from getting lost
The physics was never the risk. The risk was me wiring something wrong, running the full program, seeing a blank screen and having no idea which of twenty things broke. Claude’s answer was to split the build into small tests, each one proving a single piece before the next piece depended on it.
| Step | What it proved | Result |
|---|---|---|
| 0. Blink | The board and MicroPython work | Pass. Pico 2 W, MicroPython v1.29.0 |
| 1. I2C scan | The screen is wired and answering | Pass. Found at address 0x3C |
| 2. Draw on the OLED | The screen is the chip we think it is | Pass. Text sat flush left, so a genuine SSD1306 |
| 3. Raw mic levels | The microphone hears the room | Failed, then passed on version 2 (see below) |
| 4. Meter live | Filter, math and display together | Pass. Quiet room 33.7 dBA |
| 5. Calibration | The numbers match a reference | Pass. Offset 124.0 |
I ran each one in Thonny, the free Python editor for these boards, and pasted back exactly what it printed. That is a skill anyone has. You do not need to understand the output. You need to copy it accurately.
The staged approach paid for itself twice.
Bug one: the microphone that looked dead
Test 3 printed the microphone level over and over. It read about -25.3 dBFS and barely moved. Claps only nudged it 2 to 4 dB. To someone like me, that looks exactly like a broken mic, and the obvious move is to order another one.
Claude looked at the numbers and said the mic was fine. This model of microphone puts out a large constant offset on top of the actual sound, a bit like a scale that reads five pounds with nothing on it. The first version of the test measured the total signal, and that constant offset was so big it drowned out the room. The fix was to subtract the average before measuring. Version 2 showed the real picture: a quiet room at -72 to -78 dBFS, talking at -63 to -70, claps up to -26.1. That is 52 dB of usable range.
The good news: the real meter was never affected. The A-weighting filter throws away a constant offset completely, on its own. Claude checked that the readings were identical with and without the offset to four decimal places. The bug lived only in the test script.
Bug two: the phantom 95 at power-on
This one came from real data, not from anyone predicting it. For about the first second after the meter powers on, the microphone’s offset drifts while its internal circuit settles. During that window the level read about 25 dB too high.
On a regular sound meter that is a flicker you would ignore. On a dose meter it is a problem, because a fake 95 dBA reading gets added to the day’s total and never leaves. The fix is a two-second warm-up at startup where the meter listens but does not count. I would not have caught that, and I would not have known it mattered.
Calibrating with a phone app
You need a reference to calibrate against. A real Type 1 meter costs more than this whole project many times over. Claude pointed me to the NIOSH Sound Level Meter app for iPhone, which NIOSH tested at plus or minus 2 dB against a Type 1 reference between 65 and 95 dB.
Comparing the two live numbers does not work well. The phone and the meter average over different windows, so with music playing they rarely agree at the same instant. What worked:
- Hold BOOTSEL on the Pico to reset its average.
- Start a fresh measurement in the app at the same moment.
- Play music at a normal working level for about a minute.
- Compare the average (LAeq) on each and adjust the offset until they match.
No test tones, no pink noise. I calibrated at around 70 dBA, which sits inside the range the app was tested for. Claude was specific about one thing: do not calibrate near 40 dBA, because that is close to the mic’s noise floor and outside where the app was validated.
The offset landed at 124.0. The datasheet math said 123.0. One dB off from theory, on a first build, by someone who knows nothing about electronics. And since the app itself is only good to plus or minus 2 dB, chasing tenths past that would only be measuring the app’s errors.
What it can’t do
- It cannot hear headphones. This is the big one. Plenty of engineers do their damage on headphones, and this meter only knows about the room. The free workaround is to match the headphones’ loudness to the speakers once and note where the volume knob sits.
- It bottoms out around 40 dBA. It is not a tool for measuring how quiet a room is.
- Position matters more than calibration. Halve the distance to the speaker and the reading jumps 6 dB. It has to live at my mix position, at ear height, and stay there.
- It is not certified. It is for my own ears, not for anyone’s compliance paperwork.
What’s next
First, mount it at the mix position and leave it alone, because day-to-day consistency is where the value is. Then turn on the Wi-Fi clock so the dose resets itself at 4 a.m., and send the readings to my home server so I can see months of history instead of one session. I already have that box running, set up the same way as this project, with Claude doing the parts I don’t know. I wrote that one up in how I set up a Proxmox home server with Claude.
The bigger lesson for me is the same one I had making Nashville number charts with Claude. Knowing nothing about a field used to mean you could not start. Now it means you go slower, you test in small steps, and you have to be honest about what you are reporting back. The knowledge gap is still real. It just stopped being a wall.
FAQ
Can a Raspberry Pi Pico measure decibels accurately?
Close enough for hearing safety, if you use the right microphone. Mine uses a digital I2S mic with a factory-specified sensitivity, an A-weighting filter, and one calibration constant. It agrees with the NIOSH phone app to within that app’s own plus or minus 2 dB. It is not a certified sound level meter.
Why not use a cheap analog sound sensor like the KY-038?
Analog modules like the KY-038, MAX4466 and MAX9814 have no calibrated sensitivity, so a reading from one does not map to a real decibel level. The Adafruit SPH0645LM4H is specified at -26 dBFS at 94 dB SPL, which gives the math something real to start from.
What is a noise dose?
It is how much of a safe daily amount of sound you have used. The NIOSH limit is 85 dBA for 8 hours, and every 3 dB louder halves the time. At 94 dBA you reach 100 percent of the day’s dose in 1 hour. At 100 dBA it takes 15 minutes.
How do you calibrate a DIY dB meter without a reference meter?
I used the NIOSH Sound Level Meter app on an iPhone. Reset both, play music at a normal working level for about a minute, and compare the average (LAeq) on each, not the moving number. My calibration offset came out at 124.0 against a theoretical 123.0.
Does a room dB meter measure headphone volume?
No. The microphone hears the room, not what is inside your headphones. This meter is for working on speakers. Measuring headphones properly needs a different setup, such as a mic sealed inside the earcup or an electrical tap on the headphone output.
Do I need to know electronics to build this?
I didn’t. Claude picked the parts, wrote the code, and split the build into small tests that each proved one thing. My job was to wire what it described, run each test in Thonny, and report back exactly what the screen said.
More from the room
This meter came out of how I work on music, and the rest of that lives on my music page, along with the chart workflow and the gear notes as they get written.
Stay in the loop.
No spam, just signal.
I send one email when I publish something worth reading. Stock deep dives, new projects, tech breakdowns, and what I'm learning from building in public.
Free forever. Unsubscribe anytime. I respect your inbox.